Setting Up Your Home Cinema AV Receiver - A Simple Guide

At the heart of any good quality home cinema system is the amplifier, and setting up (or calibrating) this correctly will ensure that you are getting the most out of your speaker system. This blog post aims to guide you through this setup so that you get the best sound from your home cinema system.
Home cinema amplifiers, also known as an AV receiver (a receiver is simply an amplifier with an integrated radio tuner), AVR, or a surround sound amplifier, have evolved greatly from the early Dolby Pro-Logic models of the 1980s and most now feature a multitude of surround sound formats as well as Wi-Fi and Bluetooth connectivity and compatibility with voice control systems such as Amazon Alexa and Google Home.
1. Auto Setup On The AV Receiver
2. Manual Fine Tuning On The AV Receiver
3. Configuring The AV Receiver To Your Speaker Setup
4. HDMI Switching On AV Receivers
Auto Setup On The AV Receiver

Almost all models are now are supplied with a microphone and feature an auto-setup routine. This involves connecting the microphone to the amplifier, initiating the setup routine and letting the microphone register the tones sent out. This tells the amplifier where each speaker is in relation to one another and their relative sizes. Better-equipped models use advanced systems that also take into account room acoustics and audio reflections from walls, floors and ceilings.
Manual Fine Tuning On The AV Receiver

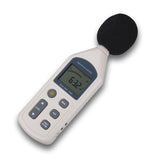
Whilst auto-setups typically give good results, sometimes errors can creep in, and on top of this every AV system can benefit from some fine-tuning. By following the manual setup procedure using an SPL (Sound Pressure Level) meter you can personally adjust the volume level of each channel. We have found that in many cases double-checking the channel levels set by the receiver yourself will result in a more accurate balance between the speakers, and also offers the opportunity to adjust levels to suit a listening preference, for example turning up the centre speaker to reinforce the dialogue. An SPL meter can be purchased inexpensively online and we believe this to be a good investment considering the cost of an AVR.
Setting up a subwoofer is little bit trickier as the lower frequencies don’t provide as constant an output and further fine-tuning is likely to improve results. We have a blog post coming soon to explain this in further detail.
Configuring the AV Receiver To Your Speaker Setup

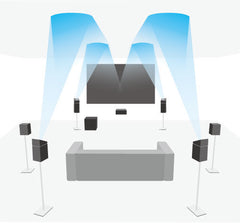
The AVR may also need configuring to accommodate your specific speaker setup. Most models above a basic level offer seven channels of amplification, allowing you to choose a 7.1 set-up, or a 5.1.2 Dolby Atmos configuration. If you aren’t using either of these the ‘spare’ channels of amplification can often be used to run a further pair of speakers in another area as an independent second audio zone.
HDMI Switching On AV Receivers

HDMI switching is another very useful benefit, allowing multiple AV sources (e.g. BluRay/ DVD player, Sky/ cable box, streaming devices) to be connected and the AVR used to switch both the audio sent to the speakers and the video sent to the screen at the same time. The audio from the TV can often also be sent back down the same HDMI cable to the AVR using the ARC (Audio Return Channel) function of the TV. This means easier wiring (and less of it too) as well as a simpler and more intuitive system control.
The once simple amplifier has taken on many more roles and fulfils more requirements than ever before, and all of these add greatly to the watching and listening experience as well as offering advanced fine tuning to achieve the perfect sound. Despite the multitude of new features, we believe home entertainment systems are easier than ever to set up and use.
As always, we are more than happy to help you with any questions you have about buying an audio system and can even look over your floor plans to help you spec your perfect audio solution. You can submit a contact form here, email us at sales@ceiling-speakers.co.uk or just give us a ring on 03456 803 802.

